S1.2: Adjusting Suspension
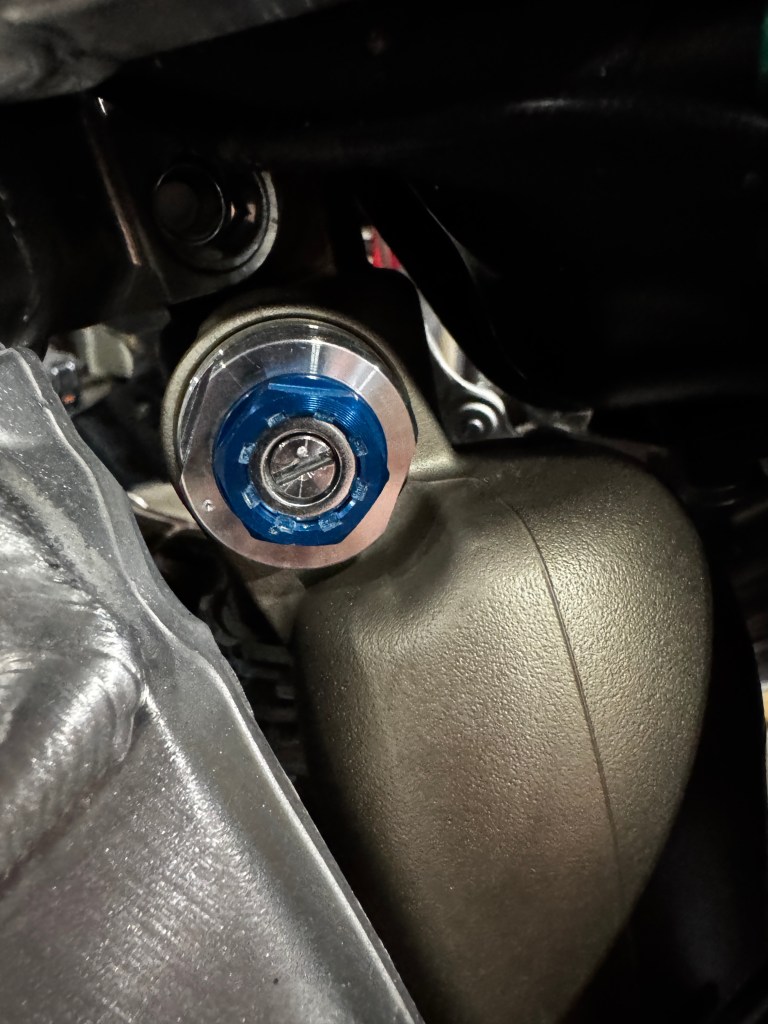
Fork Clicker (YZ)
Depending on the bike will depend on what clicker is where; forks have 2 clickers, compression and rebound. Check your manual for which one is which & where they are located. Some brands have one at the top of each fork. Others have the top and bottom of one fork.
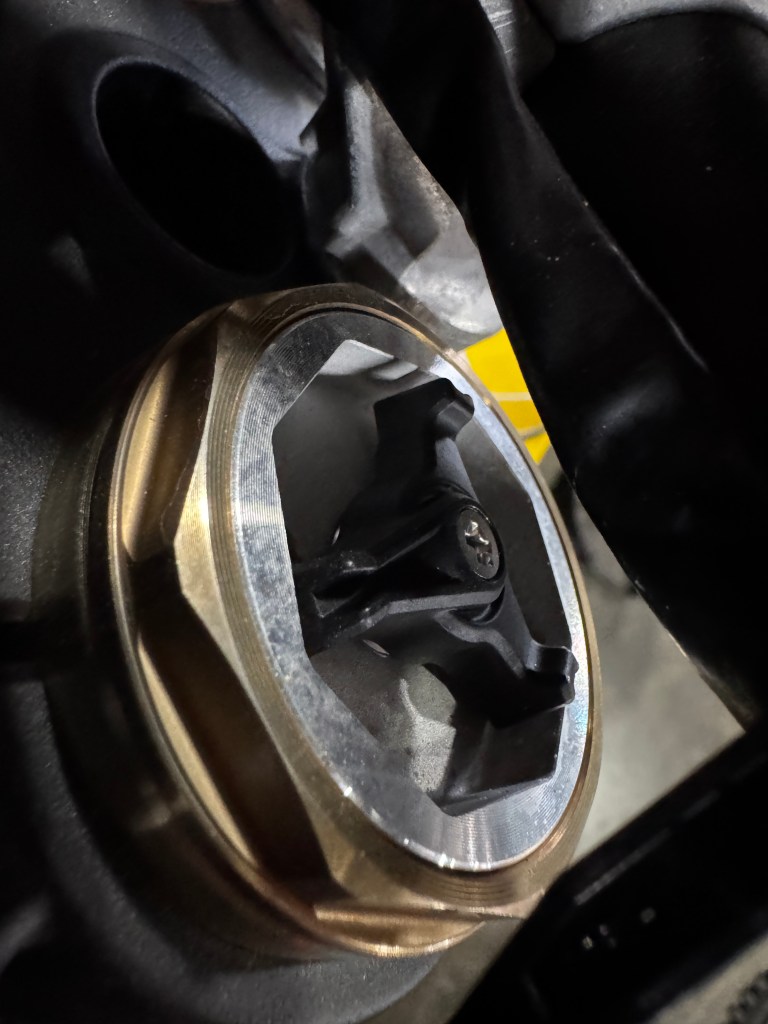
Shock Clicker (YZ)
Just like the fork, you have rebound and compression but with shocks, you have high-speed compression and low-speed compression; the low speed will always be the “clicker,” & high speed will always be the nut/turning dial. The rebound clicker is usually located at the bottom of the shock (it is always safe to check the manual just in case).
Welcome to the second post on getting your dirtbike dialed in. There are tons of steps to getting the bike fully set up for you, including the type of riding you will be doing. This post is specifically for track guys who want to adjust there clickers to the right settings. Clickers aren’t the easiest thing to understand but they are very learnable…
- The first thing to know about clickers is that most of the time, turning the clicker clockwise or to the right means closing that clicker. A closed clicker would essentially be the stiffest setting for your suspension. And vice versa, turning the clickers counterclockwise as far as possible would be the softest setting for your bike.
- The best thing to do for clickers is to go into your manual and see what the stock variations are. KTM specifically has a Comfort, Standard, & Sport mode for all of the clickers on the bike. The variations are good for a baseline idea of where you might like them.
- It’s helpful to pick the right baseline to start from. If you start on a setting way too stiff for your kind of riding, you could spend double the time to end up at the softer/stiffer baseline setting they give you. From what I’ve learned, the faster the rider, the stiffer the suspension. (Last weekend I tried out the “Sport” suspension clickers for the rear shock of my KTM, It was definitely a step in the right direction but it was quite ruff).
- Now that you have the right baseline choice, in your opinion, go through all of the clickers on your bike and turn them clockwise (confirm in your manual that that is the reset direction for your bike) to zero all of the clickers out to start from scratch.
- Turn each clicker counterclockwise to the desired amount of clicks in the manual for the desired baseline. Remember, in most cases, more clicks = softer settings.
- One clicker on your shock doesn’t click or look like a clicker. That would be your High-Speed Compression adjuster, which is measured in Turns, not clicks, but still operates off the same fundamental of clockwise to make stiffer & counter-clockwise to make softer
- From there, make a note of the current setup you have installed on your bike, and write down each individual setting you decided to go with for the front and rear shock. If you don’t have a sheet/list of the changes you have made, you will end up lost or repeating the same setting over and over because you don’t know where you started or what you have tried already.
This was just an overview of how to adjust them. The next page will be a much more in-depth detail on how to fine-tune your clickers for you & the track you at. Remember, clickers can always be changed or adjusted as long as you know where you started at. As you progress, the clickers will change with your progression, it might be right for the time being, but down the rode as you get faster it will feel way off!
Every bike is different; a good baseline for the rider can be set based on the manual, but to get them fully dialed in, you will need to adjust them and really spend the time to fine-tune them or at least find what you like or don’t like. One setting can work for one person and nobody else; if you are lazy with clickers, the bike might be lazy with you.
Page 3 contains in-depth details on tunning the front fork suspension.
